How to optimize CMS images in batches with Apify
On this page

An image optimization task sounds simple until you have a few hundred files, several output formats, and a content team waiting to publish. A smaller file helps only if it still looks right, keeps the dimensions your page needs, and has a reliable destination in your media library. When managing growing content libraries or building an automated SEO pipeline, unoptimized media assets quickly become a primary bottleneck for web performance.
This article walks you through using an Apify Actor, Sqoosh Image Compressor, to turn a list of source images into lightweight, modern web formats in batches. The Actor was originally built upon the open-source Squoosh project by Google Chrome Labs - hence its name on the Apify Store. The current release uses sharp and libvips for encoding under the hood. While the Actor preserves its existing Store name and common compatibility input keys, it no longer depends on legacy client-side Squoosh workers.
In this guide, you will prepare a small sample list, request JPEG and WebP outputs, inspect the generated records and artifacts, and create a review mapping ready for a safe CMS import. The workflow stops at a reviewable output stage; replacing production CMS assets remains a deliberate, separate step requiring your CMS credentials and an approved mapping.
How to optimize CMS images in batches with Apify
What the workflow produces
Each successful source-image and output-codec pair produces two distinct outputs: a structured record in the run's default dataset and a downloadable binary file in the run's key-value store. For example, requesting both JPEG and WebP for a single image produces two dataset rows and two stored files. If a conversion fails, the Actor logs the error and excludes it from the successful outputs.
The primary dataset fields describe the source URL, selected codec, output key, original byte size, and encoded byte size. Always inspect the actual dataset before feeding output keys into downstream automation.
The compatibility key mozjpeg encodes standard JPEG files through sharp; it does not invoke the legacy MozJPEG WebAssembly binary. Currently supported encoder keys are mozjpeg, webp, avif, and oxipng (which produces optimized PNGs). This release does not support formats such as JXL and WP2, and it fails explicitly rather than silently falling back to another format.
Output files are stored as run artifacts. Download them or transfer them to permanent cloud storage before your Apify storage retention period expires. An Apify artifact URL is designed for inspection and data transfer, so avoid using it as a permanent CMS media link.
Step 1: Choose a representative image sample
Start with images that you own or have permission to process. A useful first sample includes a photograph, a transparent graphic, an image with small text, and an unusually wide or tall banner. If you manage an e-commerce product catalog, include both a high-resolution product detail image and a thumbnail. Testing distinct asset types helps you quickly expose format-specific artifacts and quality issues.
Make sure to provide direct, publicly accessible image URLs. A web page containing an embedded image is not the same as the raw image file. Similar to collecting source links in batch media workflows, URLs that require an active browser login session, an expired signed token, or access to a private network will fail to download.
Maintain a simple source inventory with an internal asset ID, original URL, intended page role, current pixel dimensions, and whether transparency must be preserved. Add a dedicated column for the CMS asset ID if you plan to import results back into your database. Never rely on filenames alone to match assets, as different folders across large sites frequently share identical filenames.
For your initial run, stick to two or three images. A small, bounded test proves your input and transfer path without burning compute or leaving you with hundreds of unreviewed conversions.
Step 2: Configure the image conversion
Open Sqoosh Image Compressor in the Apify Console and configure a bounded JSON input. Click on the "Try for free" button
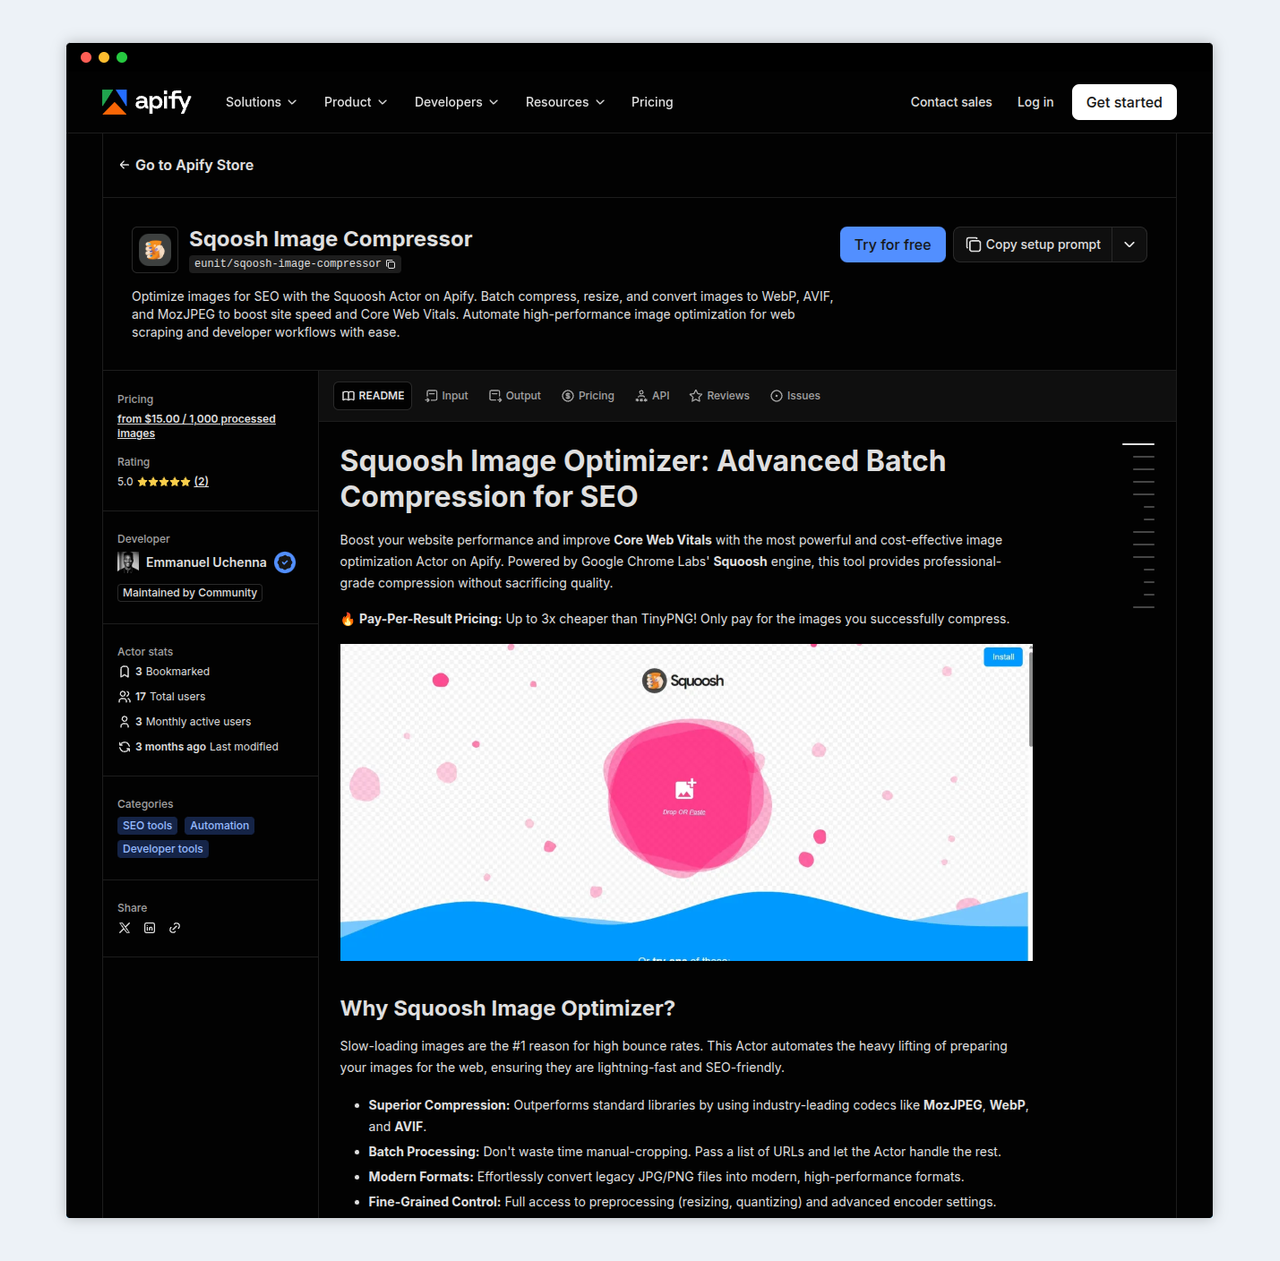
Sqoosh Image Compressor
Here is a minimal configuration requesting JPEG and WebP outputs for a single public test image:
{
  "images": [
    "https://httpbin.org/image/png"
 ],
  "encode": {
    "mozjpeg": {
      "quality": 75
 },
    "webp": {
      "quality": 75
 }
 }
}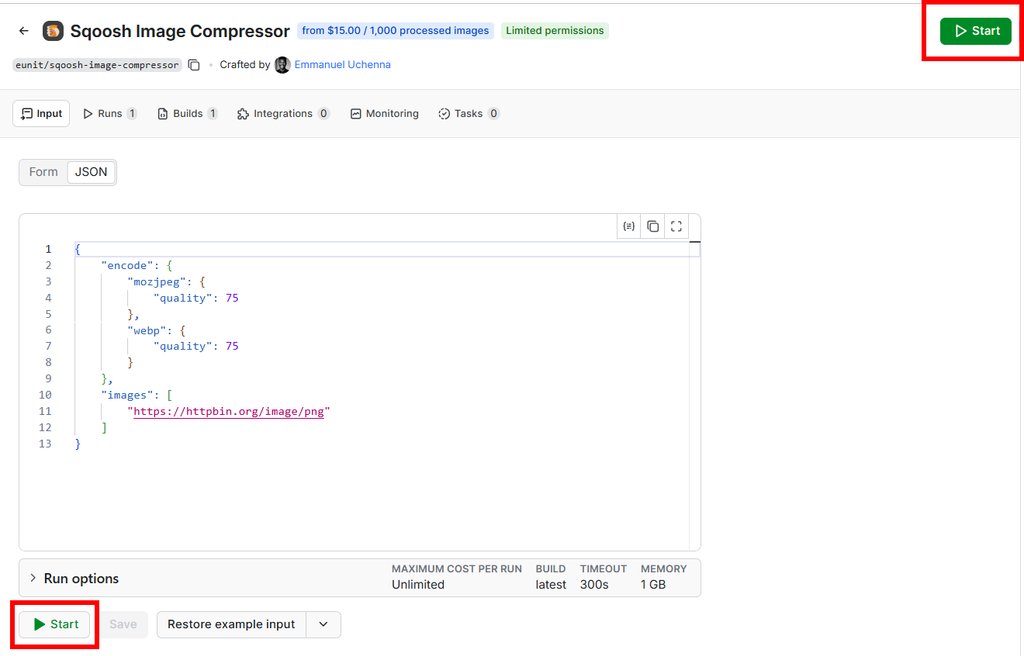
Sqoosh Image Compressor - Inpu ton Apify
Replace the test URL with an image from your own inventory for your acceptance check. Public test endpoints can change or go offline, so do not rely on them for production work.
The quality setting of 75 serves as a practical baseline for evaluation, not a universal rule. Quality values are not directly comparable across different codecs. A photograph often looks clean at 75, whereas a software dashboard screenshot or a graphic with sharp typography may show visible compression artifacts at that same setting.
The Actor enforces runtime safety bounds on image count, total downloaded bytes, pixel dimensions, output file sizes, and conversion duration. These boundaries prevent oversized images or runaway batches from exhausting resources. Review the input schema and documentation for exact limits before scaling up, and avoid bypassing limits without checking your source image dimensions.
Step 3: Run a small batch and inspect the evidence
Run the Actor and wait for it to finish. Once complete, inspect both the dataset and the key-value store. A green "Succeeded" status indicates that the container completed its run, but you still need to verify the generated outputs. Confirm that the dataset contains the expected number of successful rows and that the corresponding files exist in storage.
For the single-image input above requesting two codecs, you should see two successful rows: one JPEG and one WebP. If only one row appears, check the run log to see what failed rather than assuming both were processed.
Download and inspect each generated image in an image viewer. Check the entire frame alongside fine details: sharp borders, fine text, gradients, skin tones, and transparent backgrounds. Verify the dimensions as well. An image that opens successfully but loses transparency, rotates unexpectedly, or renders at incorrect dimensions is not ready for production CMS use.
The Actor's build has been validated with local and cloud JPEG and WebP outputs, and automated tests verify decoding for generated JPEG, WebP, AVIF, and PNG files. While this confirms that the encoding pipeline functions as designed, it does not guarantee that every output file will be smaller than its source or meet your team's visual standards.
Below are the actual 100 × 100 JPEG and WebP outputs generated from the test canary run and stored in this repository's assets:

Actual JPEG output from the private image conversion canary

Actual WebP output from the private image conversion canary
In this test, the source PNG was converted to a 3,025-byte JPEG and a 2,558-byte WebP file. The repository's provenance record tracks the run ID, build ID, source URL, and SHA-256 hashes for full verification.
Step 4: Measure file-size changes correctly
Always calculate byte savings using the exact source asset as the baseline:
def byte_savings(size_before: int, size_after: int) -> dict:
    if size_before <= 0 or size_after <= 0:
        raise ValueError("Use positive measured file sizes.")
    return {
        "bytes_saved": size_before - size_after,
        "percent_saved": round(100 * (1 - size_after / size_before), 2),
 }
A negative savings value is a completely normal outcome: it simply means the encoded output is larger than the original file. Do not drop these rows or replace negative numbers with zero to make aggregate metrics look better. Tiny icons, already compressed assets, and lossless re-encodings often result in larger files.
Keep visual quality checks separate from raw byte savings. An image that achieves a 70% size reduction but turns product packaging text blurry is unacceptable for production. A milder compression setting or an alternate format is often the better compromise. Also, if your CMS or CDN already performs on-the-fly transformations, verify whether pre-compressing assets delivers meaningful savings or merely introduces an extra layer of lossy compression.
When presenting results to your team, report sample sizes, asset types, output formats, dimensions, total bytes saved, failed inputs, and rejected visual candidates. Avoid extrapolating one dramatic saving across an entire media library. High-performing assets complement broader site optimization, such as maintaining an XML sitemap and efficient crawl structure, but raw image compression alone does not guarantee higher search rankings without measuring real-world site delivery.
Step 5: Export outputs with the Apify API
You can execute the same bounded run programmatically using Python (version 3.11 or later) and the official Apify client:
pip install "apify-client>=3.3,<4"Store your API token securely in an environment variable rather than hardcoding it in scripts, public notebooks, or client-side bundles.
import os
from datetime import timedelta
from apify_client import ApifyClient

client = ApifyClient(os.environ["APIFY_TOKEN"])

# Launch a bounded run of the Sqoosh Image Compressor Actor
run = client.actor("eunit/sqoosh-image-compressor").call(
    run_input={
        "images": ["https://httpbin.org/image/png"],
        "encode": {
            "mozjpeg": {"quality": 75},
            "webp": {"quality": 75},
 },
 },
    run_timeout=timedelta(seconds=120),
    max_total_charge_usd=0.10,
)

if run is None:
    raise RuntimeError("Actor run was not found.")
if str(run.status) != "SUCCEEDED":
    raise RuntimeError(f"Inspect the run before importing outputs: {run.status}")

# Iterate through dataset records containing output metadata
for item in client.dataset(run.default_dataset_id).iterate_items():
    print(item)
This script initiates the conversion and outputs the dataset records for verification. Orchestrating Apify Actors with Python mirrors patterns used in monitoring scheduled tasks and scraping workflows. Use the returned output keys and the run's key-value store to download approved assets, keeping your internal asset ID mapped to each record for traceability.
Note that the max_total_charge_usd parameter sets a spending cap per run. Total costs for ongoing batch jobs depend on run frequency, total converted outputs, and active Actor pricing. Check the current Store pricing model before processing large batches.
Step 6: Prepare a CMS import mapping
Create a structured reconciliation table containing one row for every source image and its replacement candidates. Include the CMS asset ID, source URL, chosen format, local output file path, dimensions, byte sizes, and an explicit approval status. If you generated multiple formats (such as WebP alongside JPEG fallback), map each format to its appropriate destination field instead of overwriting a single asset record.
Different CMS architectures handle asset updates differently:
- Some CMS platforms require uploading a new media file to obtain a new asset ID, followed by updating references in existing articles or product records.
- Other platforms allow in-place asset replacements under the same ID.
Keep these operations distinct. Uploading an optimized file does not automatically update pages referencing the old URL. If your workflow involves publishing across content hubs, maintaining structured manifests - similar to synchronizing data in automated CMS and Notion pipelines - prevents broken image links.
Test the update in a staging environment or on unpublished drafts first. Inspect pages across mobile and desktop breakpoints to verify that responsive srcset definitions, aspect ratios, focal points, and alternative text remain intact. Image encoders adjust file bytes, but presentation settings remain the responsibility of your CMS configuration.
Always retain original image files and maintain an explicit rollback mapping linking old asset IDs to new ones. If an automated import is interrupted, this mapping allows you to pinpoint where the process stopped and reverse changes if needed. A failed or missing conversion should never delete an original asset.
Wrapping up
A reliable image optimization pipeline produces verifiable files, maintains a clear link between sources and outputs, and provides a safe rollback mechanism before any CMS database is updated. By starting with a representative sample, verifying visual fidelity alongside byte counts, and scripting batch runs with Apify, you can automate image compression without risking broken layouts or degraded visuals.
To explore the tool, visit Sqoosh Image Compressor on Apify. For additional technical references, check the sharp documentation, Apify key-value store guides, and the Actor's input schema.

Emmanuel Uchenna
@eunit99Hi, I’m Emmanuel Uchenna — a frontend engineer, technical writer, and digital health advocate passionate about building technology that empowers people. With over five years of experience, I specialize in crafting clean, scalable user interfaces with React, Next.js, and modern web tooling, while also translating complex technical ideas into clear, engaging content through articles, documentation, and whitepapers.

 Emmanuel Uchenna